
Home prices suck.
There, I said it. They do!
And it’s making buying a new home unattainable for so many in this market which is why I’m super excited to tell you what I decided to do about it…
I’m sharing about the more cost effective way I found to upgrade my home in the midst of the housing crisis. I have a tiny house, it’s no surprise, you can see it right here, and all over my blog. With two boys predicted to be over six feet. 1 bathroom and a work from home lifestyle, the current state of things was indeed, “NOT WORKING”.
We were faced with a common dilemma: how to upgrade our living situation without breaking the bank or getting caught up in the chaos of the current housing market.
After much brainstorming and research, we decided that adding a “she shed” turned office to our property was the perfect solution. Not only would it provide us with the extra space we needed, but it would do so without the expenses of a full-scale renovation or the uncertainties of selling and buying a new home.
My biggest concern at the start of this journey was just how awful a random shed would end up looking on the property, both inside and out.
*Spoiler alert*, I was more than pleasantly surprised.
Step 1: Dreaming Up Our Little Shed Office
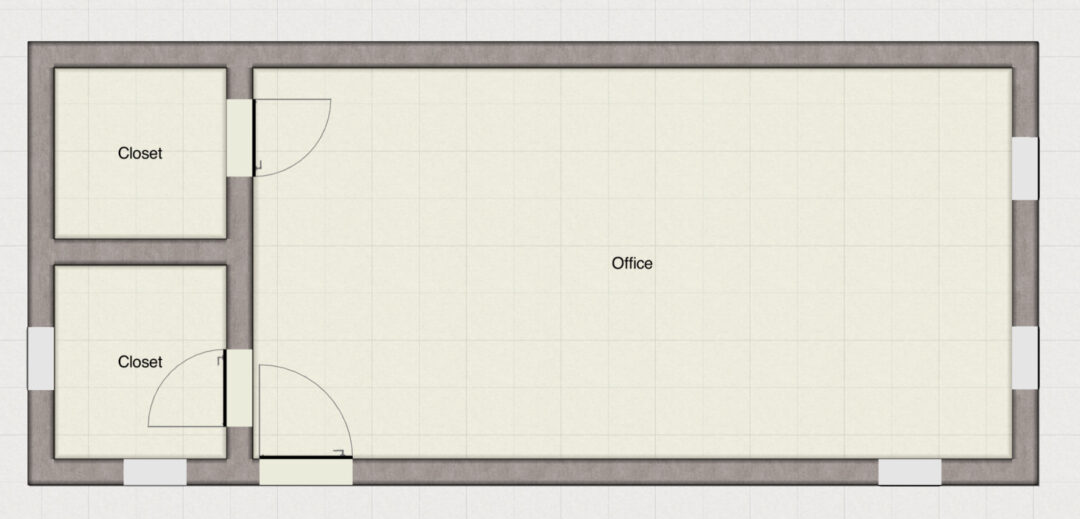
When we first started thinking about adding a shed to our property, we knew we wanted it to be more than just a storage space. It had to be functional, comfortable, and, most importantly, a place where productivity could happen. Then we turned to technology to help us bring our vision to life. Using an app called Keyplan 3D to create a detailed floor plan of our dream shed office.
Using the app was a game-changer. It allowed us to visualize the layout of the shed. Including where we wanted windows, doors, and even furniture. We could experiment with different configurations and make adjustments on the fly. Ensuring that every inch of space was utilized effectively.
When you’re working from home, a dedicated space for productivity is a non-negotiable. The “she shed” office seemed like the perfect solution to meet all our needs.
We spent hours tweaking and refining our floor plan. Making sure it would actually work. And then of course looking for a company or contractor who could bring it to life.. It was an exciting process, imagining how the shed would become an office and hopefully improve our daily lives. Once we finalized our plans, it was time for the real work to begin.
Step 2: Sharing Our Dream with Emerlin
Next, we started searching around and everyone kept pointing us to a local company called Colonial Barns and Sheds. As we got connected with them, we realized they were right in the middle of a re-brand now called, Emerlin Construction, after their grandfather’s namesake. I was like hold up, re-brands are my middle name. Let’s work together. Everyone said they had the best price, for the best work and it looked like the beginning of a beautiful friendship.
We were connected with Brian, our salesperson at Emerlin, and from our first meeting, we knew we were in good hands. Brian took the time to listen to our ideas and understand our needs. Offering valuable insights and suggestions along the way. He was patient, knowledgeable, and genuinely invested in making our shed project a success.
One of the things that impressed us most about Brian was his attention to detail. He carefully reviewed our floor plan. Making sure every aspect was feasible and practical. He also took the time to explain the construction process and what we could expect from start to finish, which was incredibly reassuring.
Another thing that stood out to us was Brian’s commitment to getting us the best possible price for our project. He worked tirelessly to find cost-effective solutions without compromising on quality, ensuring that we got the most value for our money.
Overall, working with Brian and Emerlin Construction was a pleasure. Their professionalism, expertise, and commitment to customer satisfaction were evident throughout the entire process.
Step 3: Scheduling a Site Visit with Emerlin
After finalizing our plans with Brian, the next step was to schedule a site visit with Emerlin Construction. This was a crucial step in the process, as it allowed us to assess our property and determine the best location for our shed turned office.
Brian came out to our property and spent time carefully assessing the space. He took into account factors such as the layout of our yard, the position of existing structures, and any potential obstacles that could affect the construction process. He also listened to our preferences and offered valuable suggestions on the placement of the shed to maximize natural light and views.
After the site visit, Brian worked with us to finalize the details of the project, including the timeline and cost. He was transparent and upfront about everything. Ensuring that there were no surprises along the way. Once everything was agreed upon, and the finer administrative details were nailed down. We scheduled when the first day of work should begin.
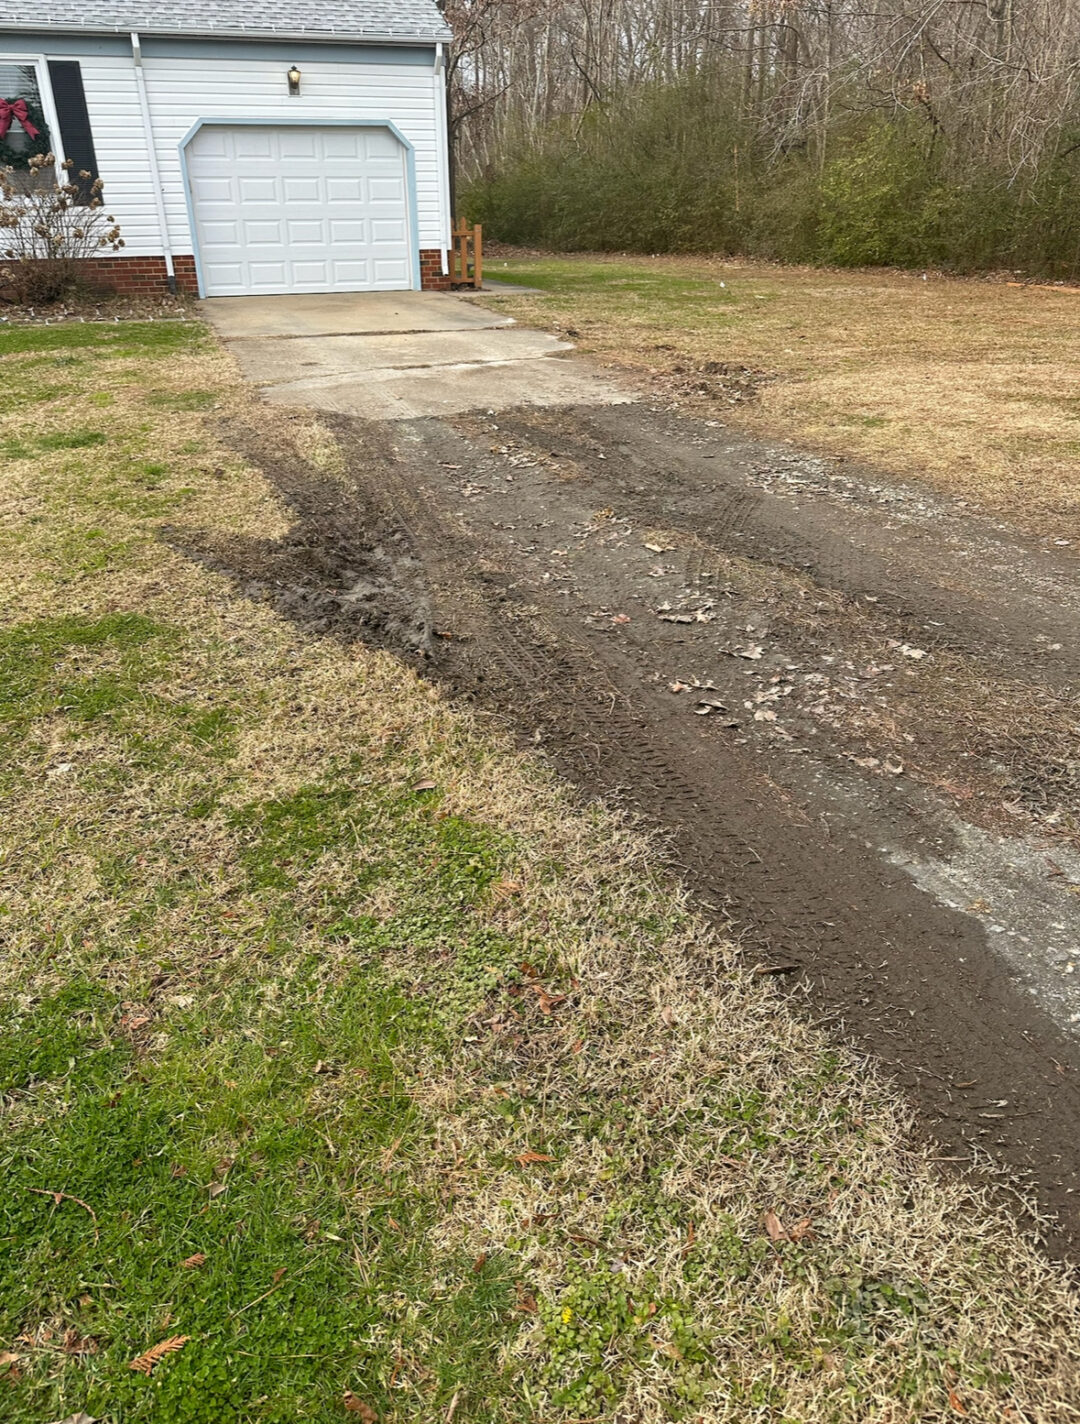
Step 4: Laying the Foundation

Meanwhile, with the location of our shed office finalized, it was time for Emerlin to start laying the foundation. This step was the moment when everything started to feel concrete; pun intended. 😉
We were amazed at how quickly and efficiently Emerlin was able to lay the foundation. In just one day, the foundation was in place, and we could start to see the outline of our shed taking shape.
While the foundation may not have looked like much at first. Eventually, we knew it would be the foundation for something incredible. It was the starting point for the “she shed” turned office, and we couldn’t wait to see it come to life.
The next step would be building the structure, and we couldn’t wait to see how it would all come together.

Step 5: Building the Structure
The most exciting part of our shed journey was seeing the structure come to life. After the foundation was laid, Emerlin wasted no time in building our shed office. It was incredible to see how fast their team worked, turning our vision into a reality in just about two days!

The first day of construction was focused on framing the structure. We watched in amazement as the walls went up. And the shape of the shed began to take form. It was a hive of activity, with the team working seamlessly together to ensure that every detail was perfect. Seriously, they sent an army of pros out to get the job done quick and painlessly.

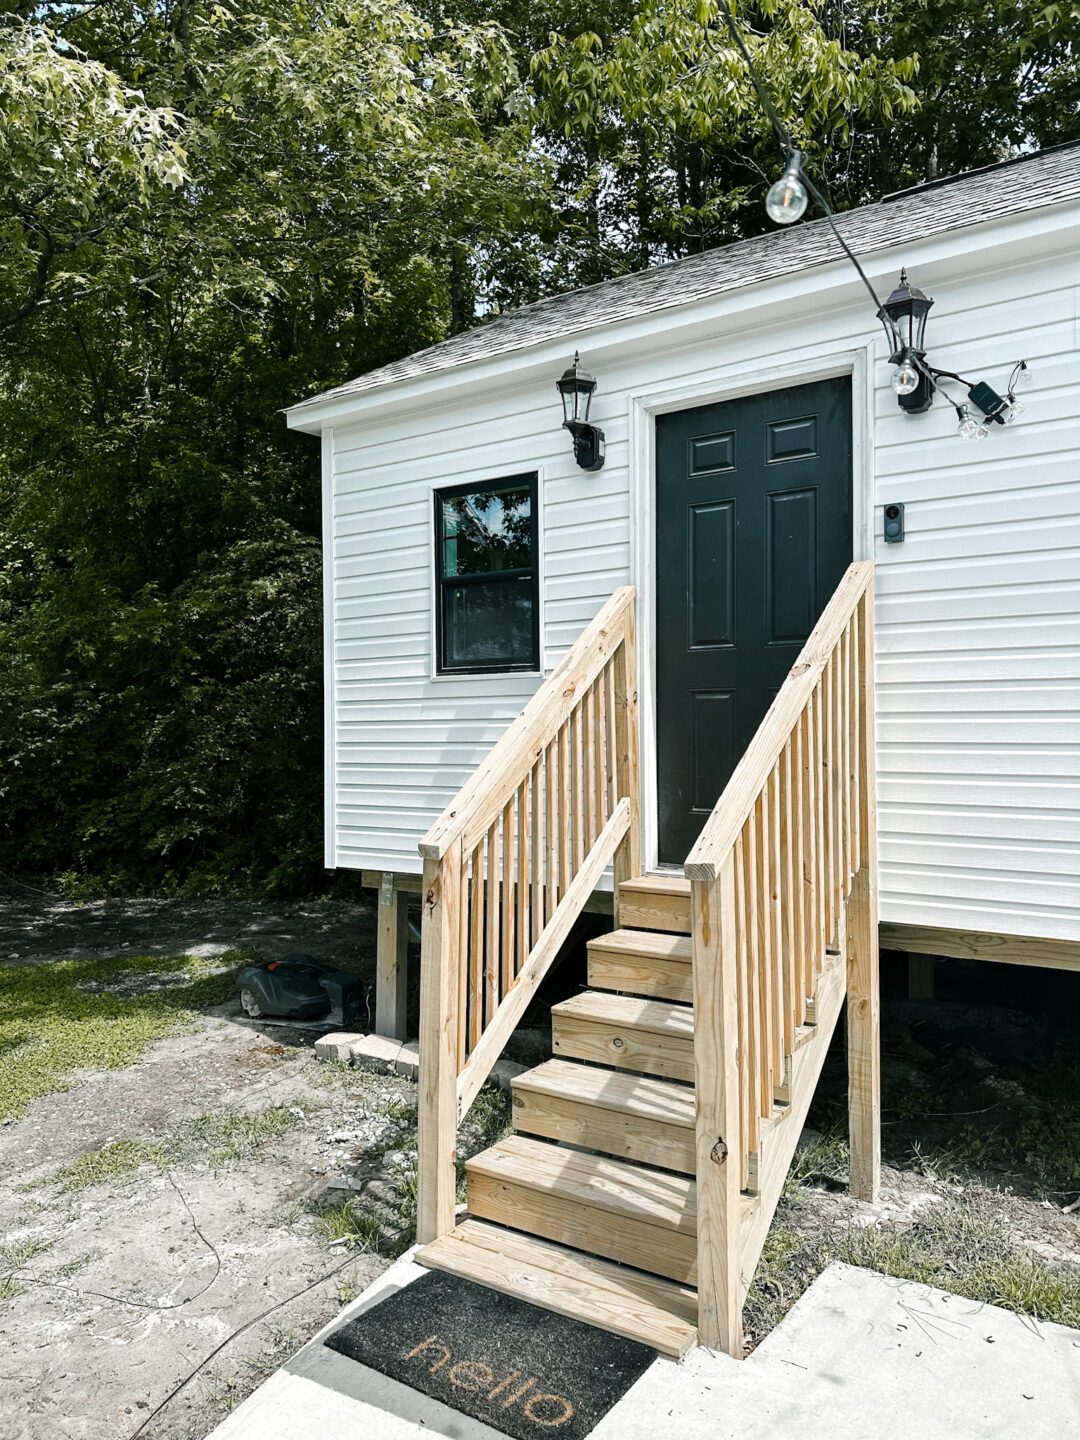
On the second day, the roof was added, and the exterior of the shed was finished. It was incredible to see how quickly it all came together. We were amazed at the transformation that had taken place in just a matter of days.
Once the structure was complete, we were able to start working on the interior. From the very beginning, we worked with Emerlin to add windows to let in natural light and provide ventilation. As an added bonus, Emerlin was able to perfectly match the roof of our new shed with the house, and also color match the siding.
Emerlin connected us to a trusted partner to help us finish the inside. However, there are still some final touches in the works, but I’m so happy with where it’s currently at. Can anyone say, hello second bathroom.
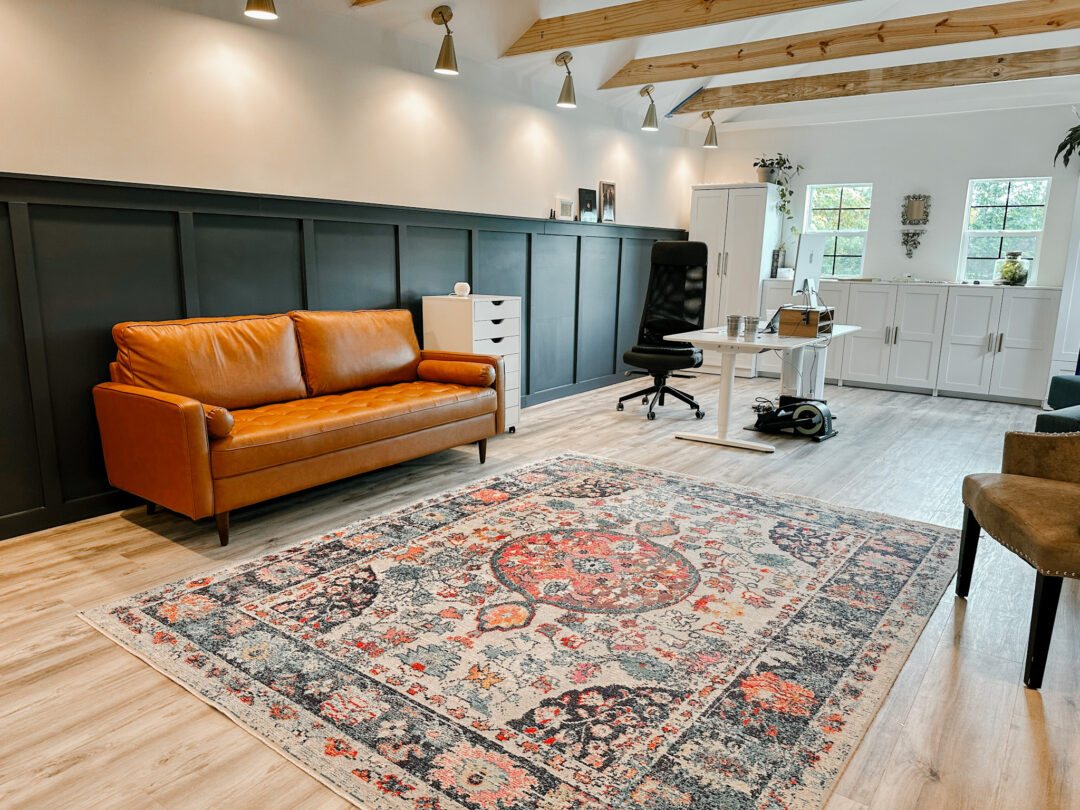
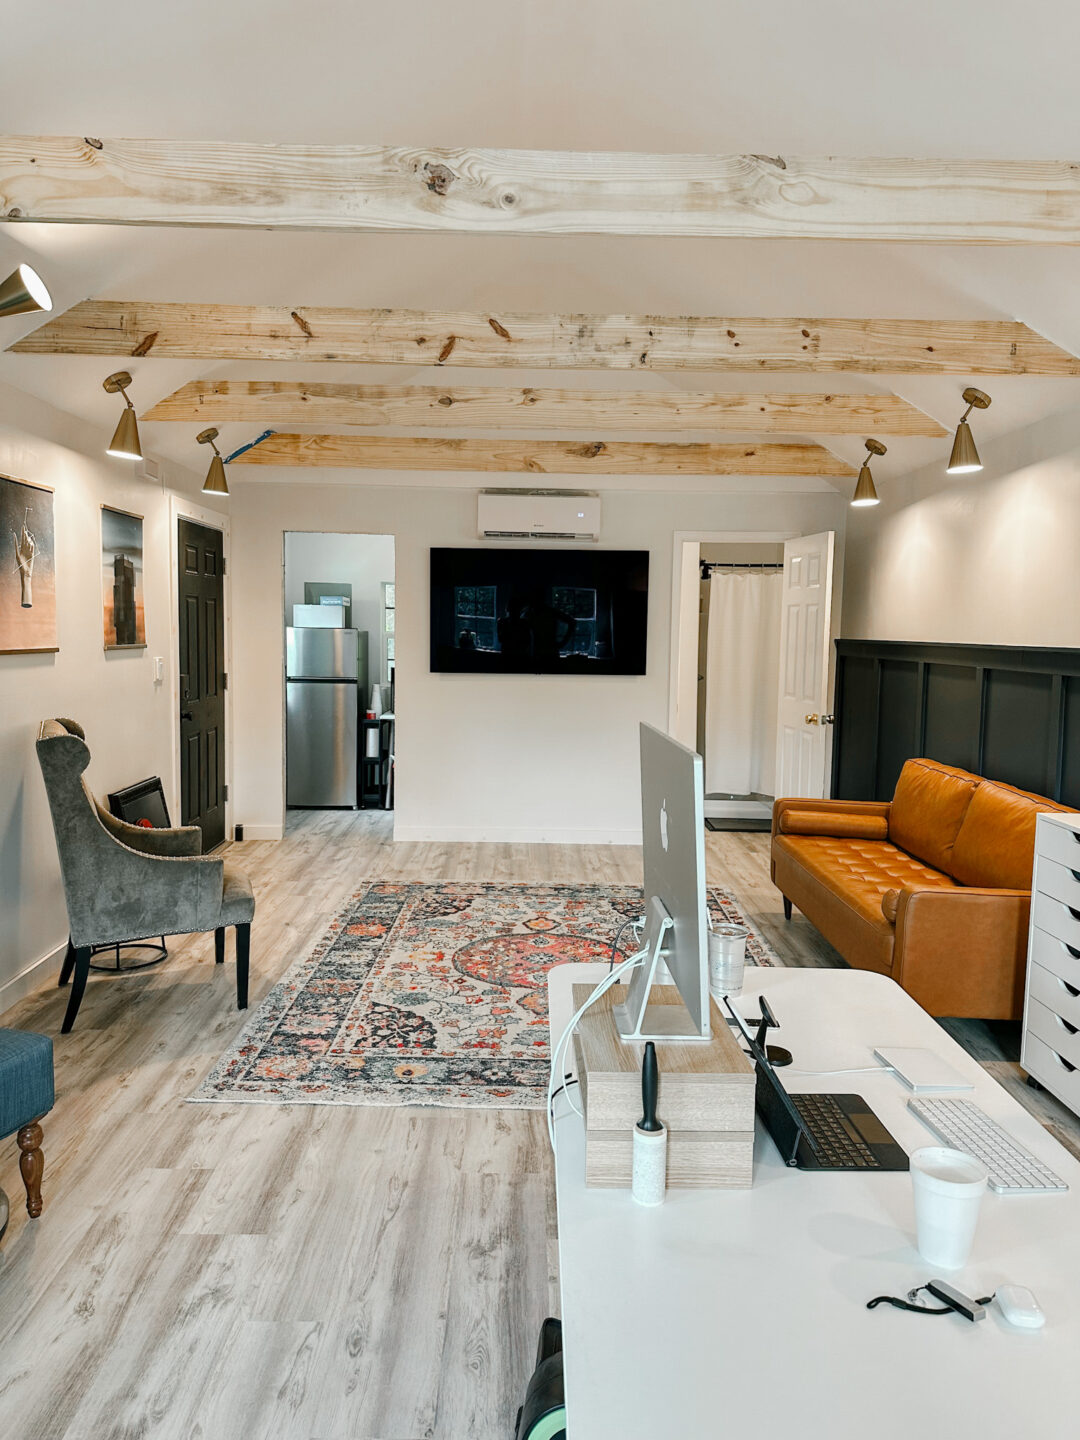
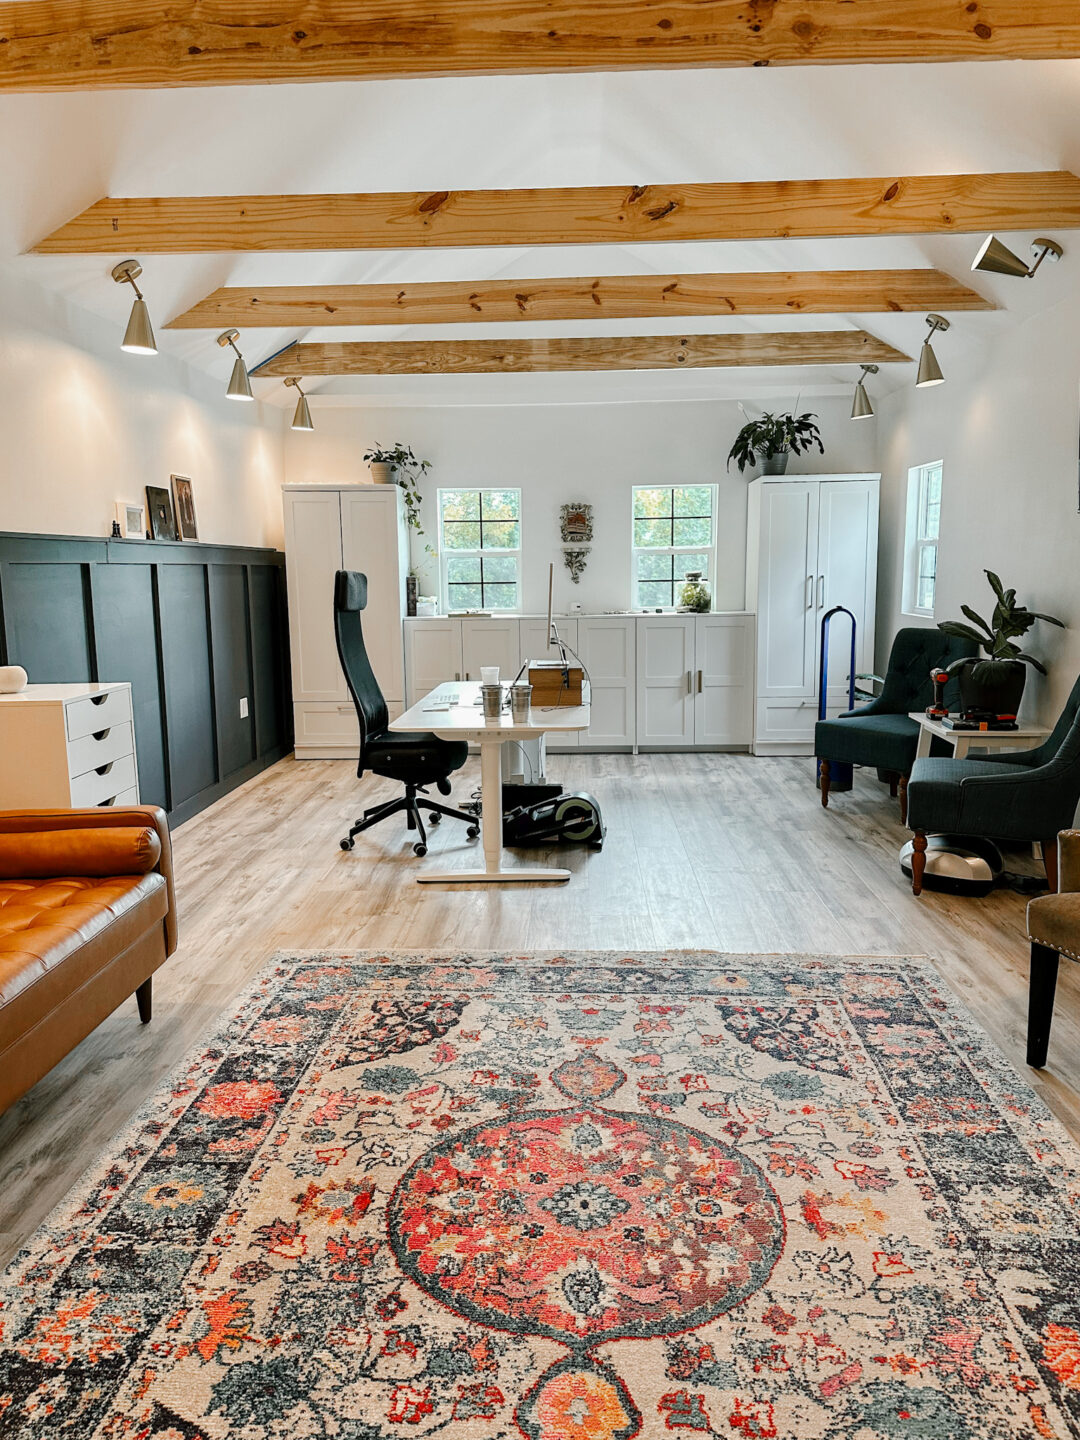
The Finished Product
Overall, our journey to adding a shed turned office with Emerlin Construction has been nothing short of amazing. What started as a solution to our need for a dedicated workspace has turned into a gorgeous addition to our property, that will increase our home value and meet our current needs.
From the fun experience of dreaming up our little shed office to seeing the structure come to life, every step of the process has been smooth and enjoyable. thanks to the professionalism and expertise of Brian and the entire Emerlin Construction team. We really didn’t expect them to build an entire structure of scratch on our property as fast as they did.
Furthermore, if you’re facing challenges in the current housing market and are looking for a cost-effective way to upgrade your living situation, consider adding a finished shed. And if you’re local or near the #757, we highly recommend working with Emerlin to do so. Not only will you get some extra space, but you’ll also be working with a team that truly cares about making your vision a reality.
So, don’t let the housing crisis hold you back; take control of your home and create the space you want! Whether you’re working on your own she shed, a tiny home, or just adding-on, getting creative is the way to reach your goals.